
By Katie Naphas /// Features Editor
It’s springtime, which means flowers. Sorry—I don’t make the rules. I do, however, make flower crowns. And, with a little time and patience, so can you.
First off, you gotta get your supplies. This is the critical moment when you decide between real or artificial flowers (or a mix, if you’re brave) and then gather whichever you choose. I chose artificial because I want my crown to last, but if you’re less concerned about that, and not worried about getting messy, go ahead and use real flowers.

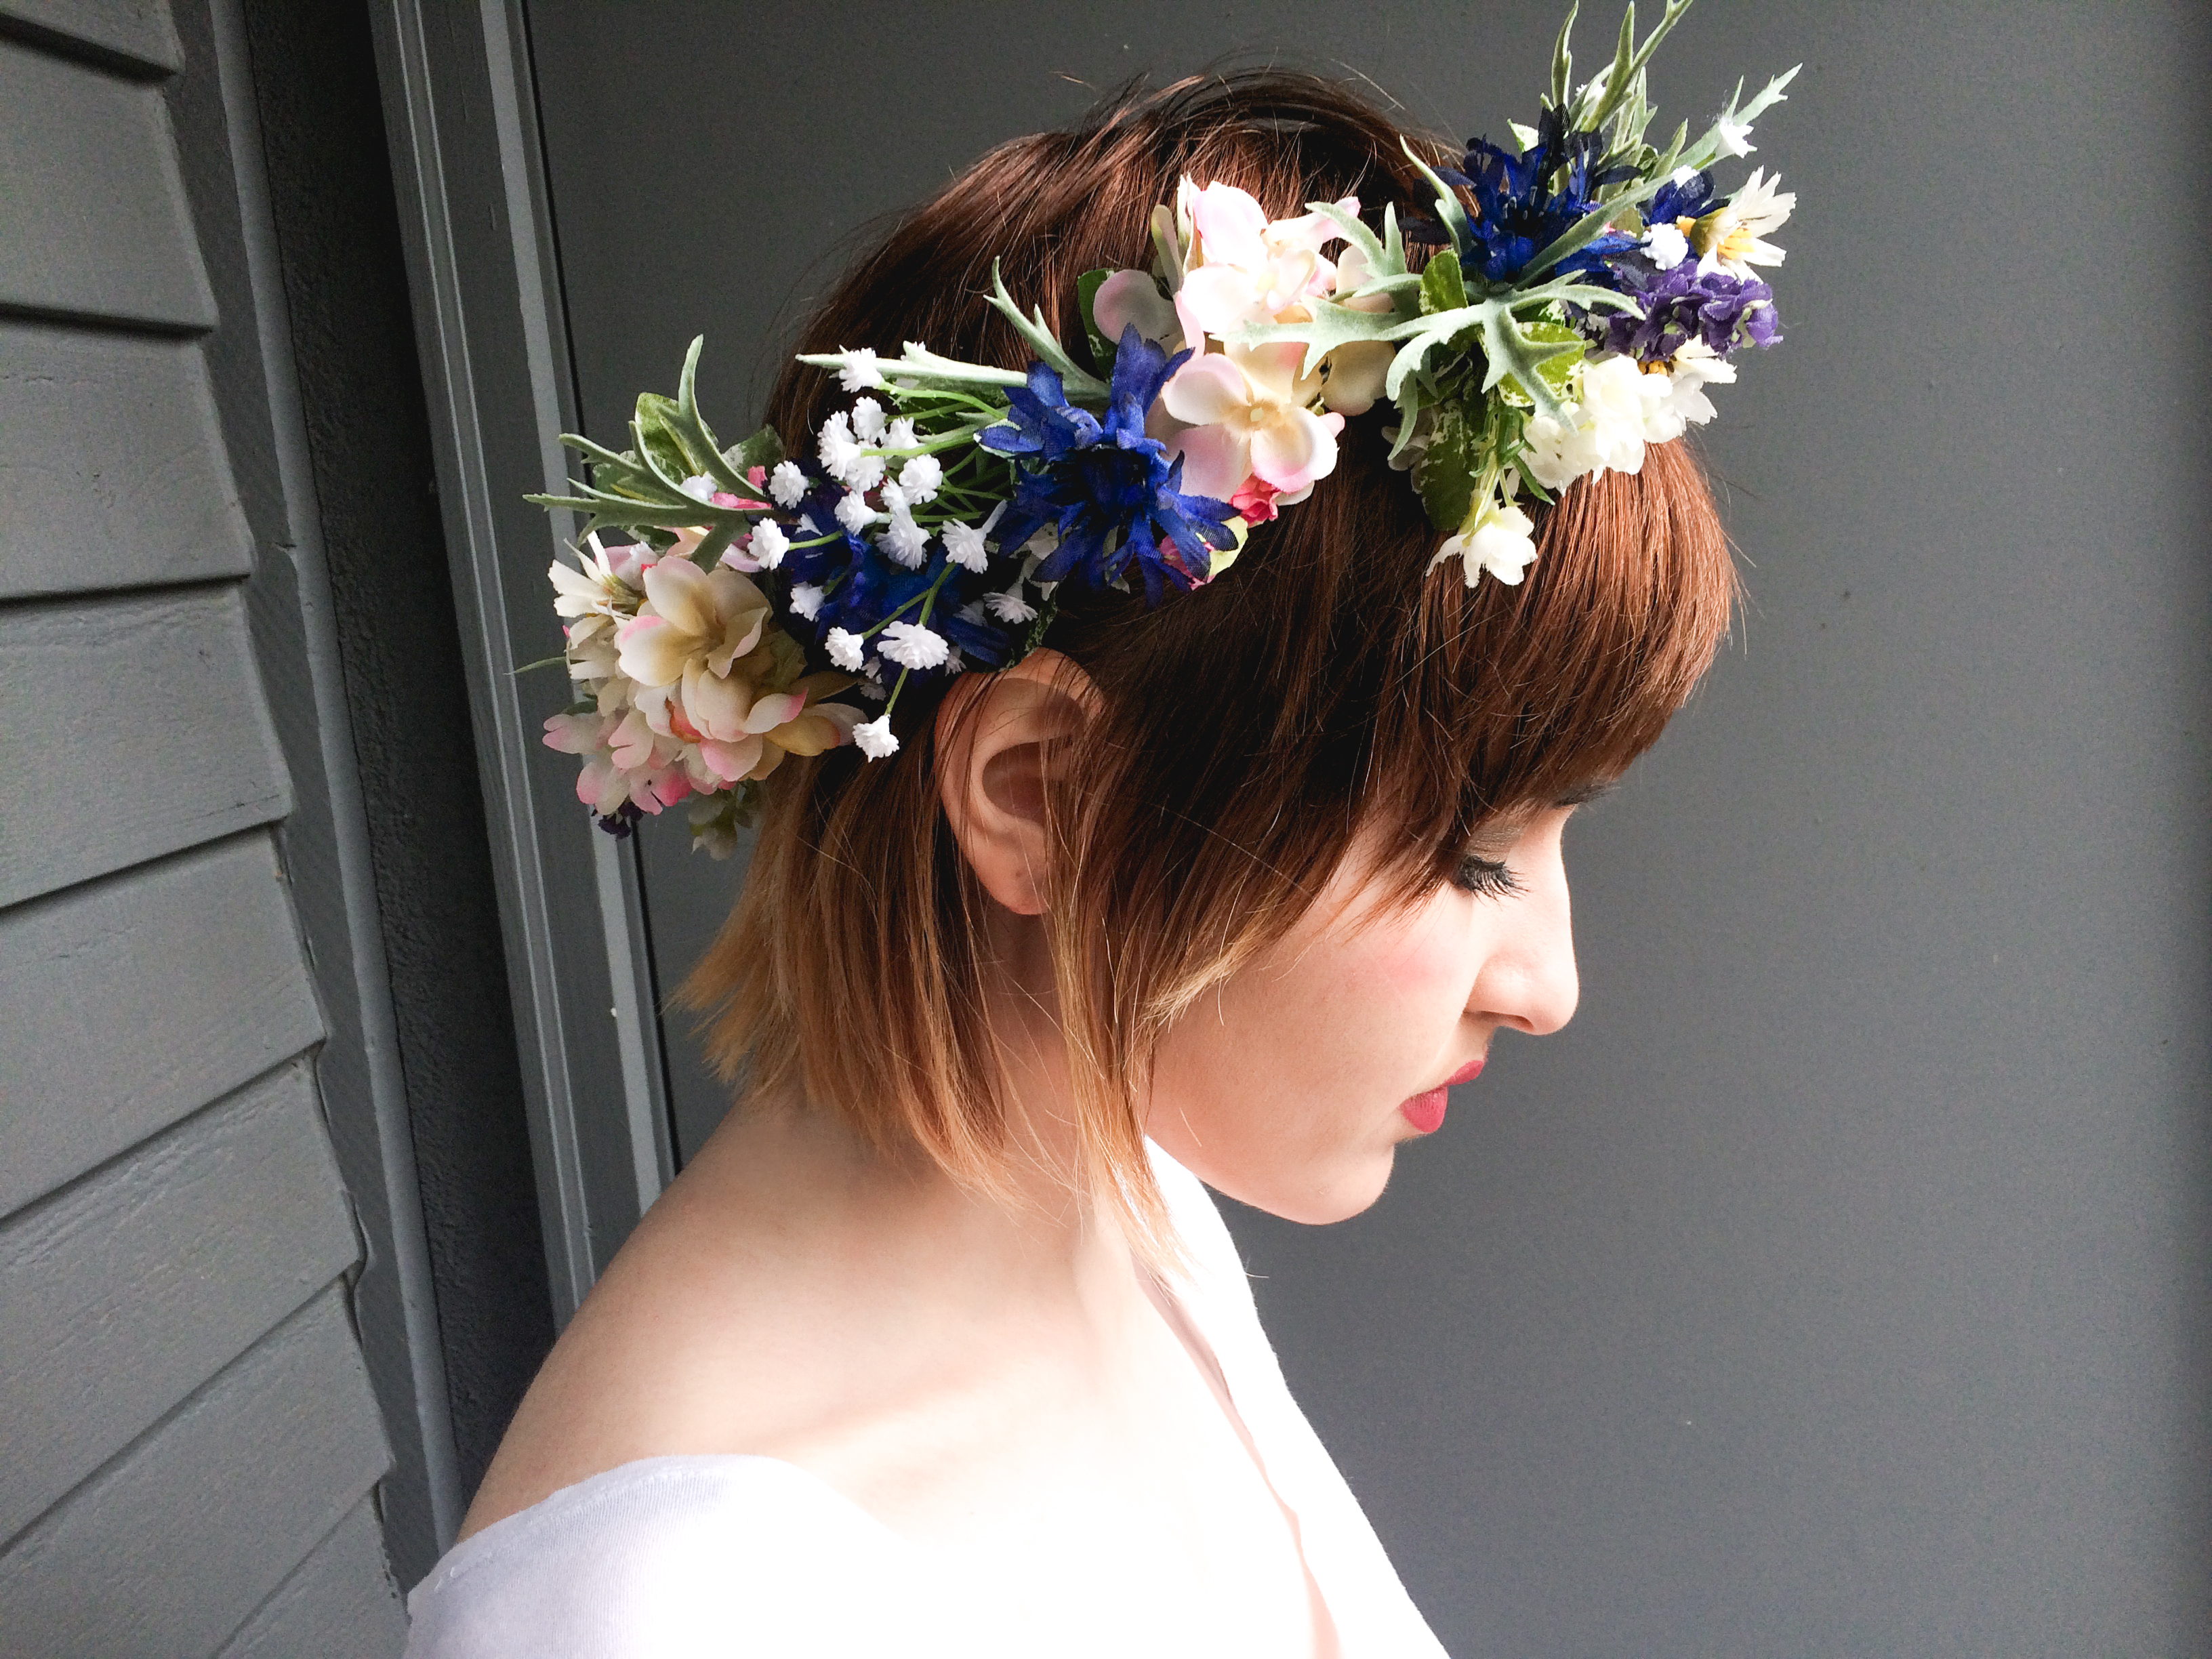
To start off, you’re going to want a wide selection of flowers and the more you get, the bulkier the crown. You can go for huge flowers all over or smaller ones for a more dainty look. It’s really up to you and whatever you’re comfortable with. I fall somewhere in between and so I got some flowers that were medium-sized, with a spattering of smaller flowers and a lot of filler flowers (i.e. baby’s breath, little paper flowers, etc.) to take up space. While you’re looking at flowers, find some greenery (once again, whether it’s real is up to you) that will be the base layer of your crown and provide a nice contrast to everything else that’s going on.
It’s pretty crucial that the flowers look good together and that there’s some semblance of a theme. This time around, I went with more muted complementary colors because the crown’s already pretty big and makes a statement on its own.
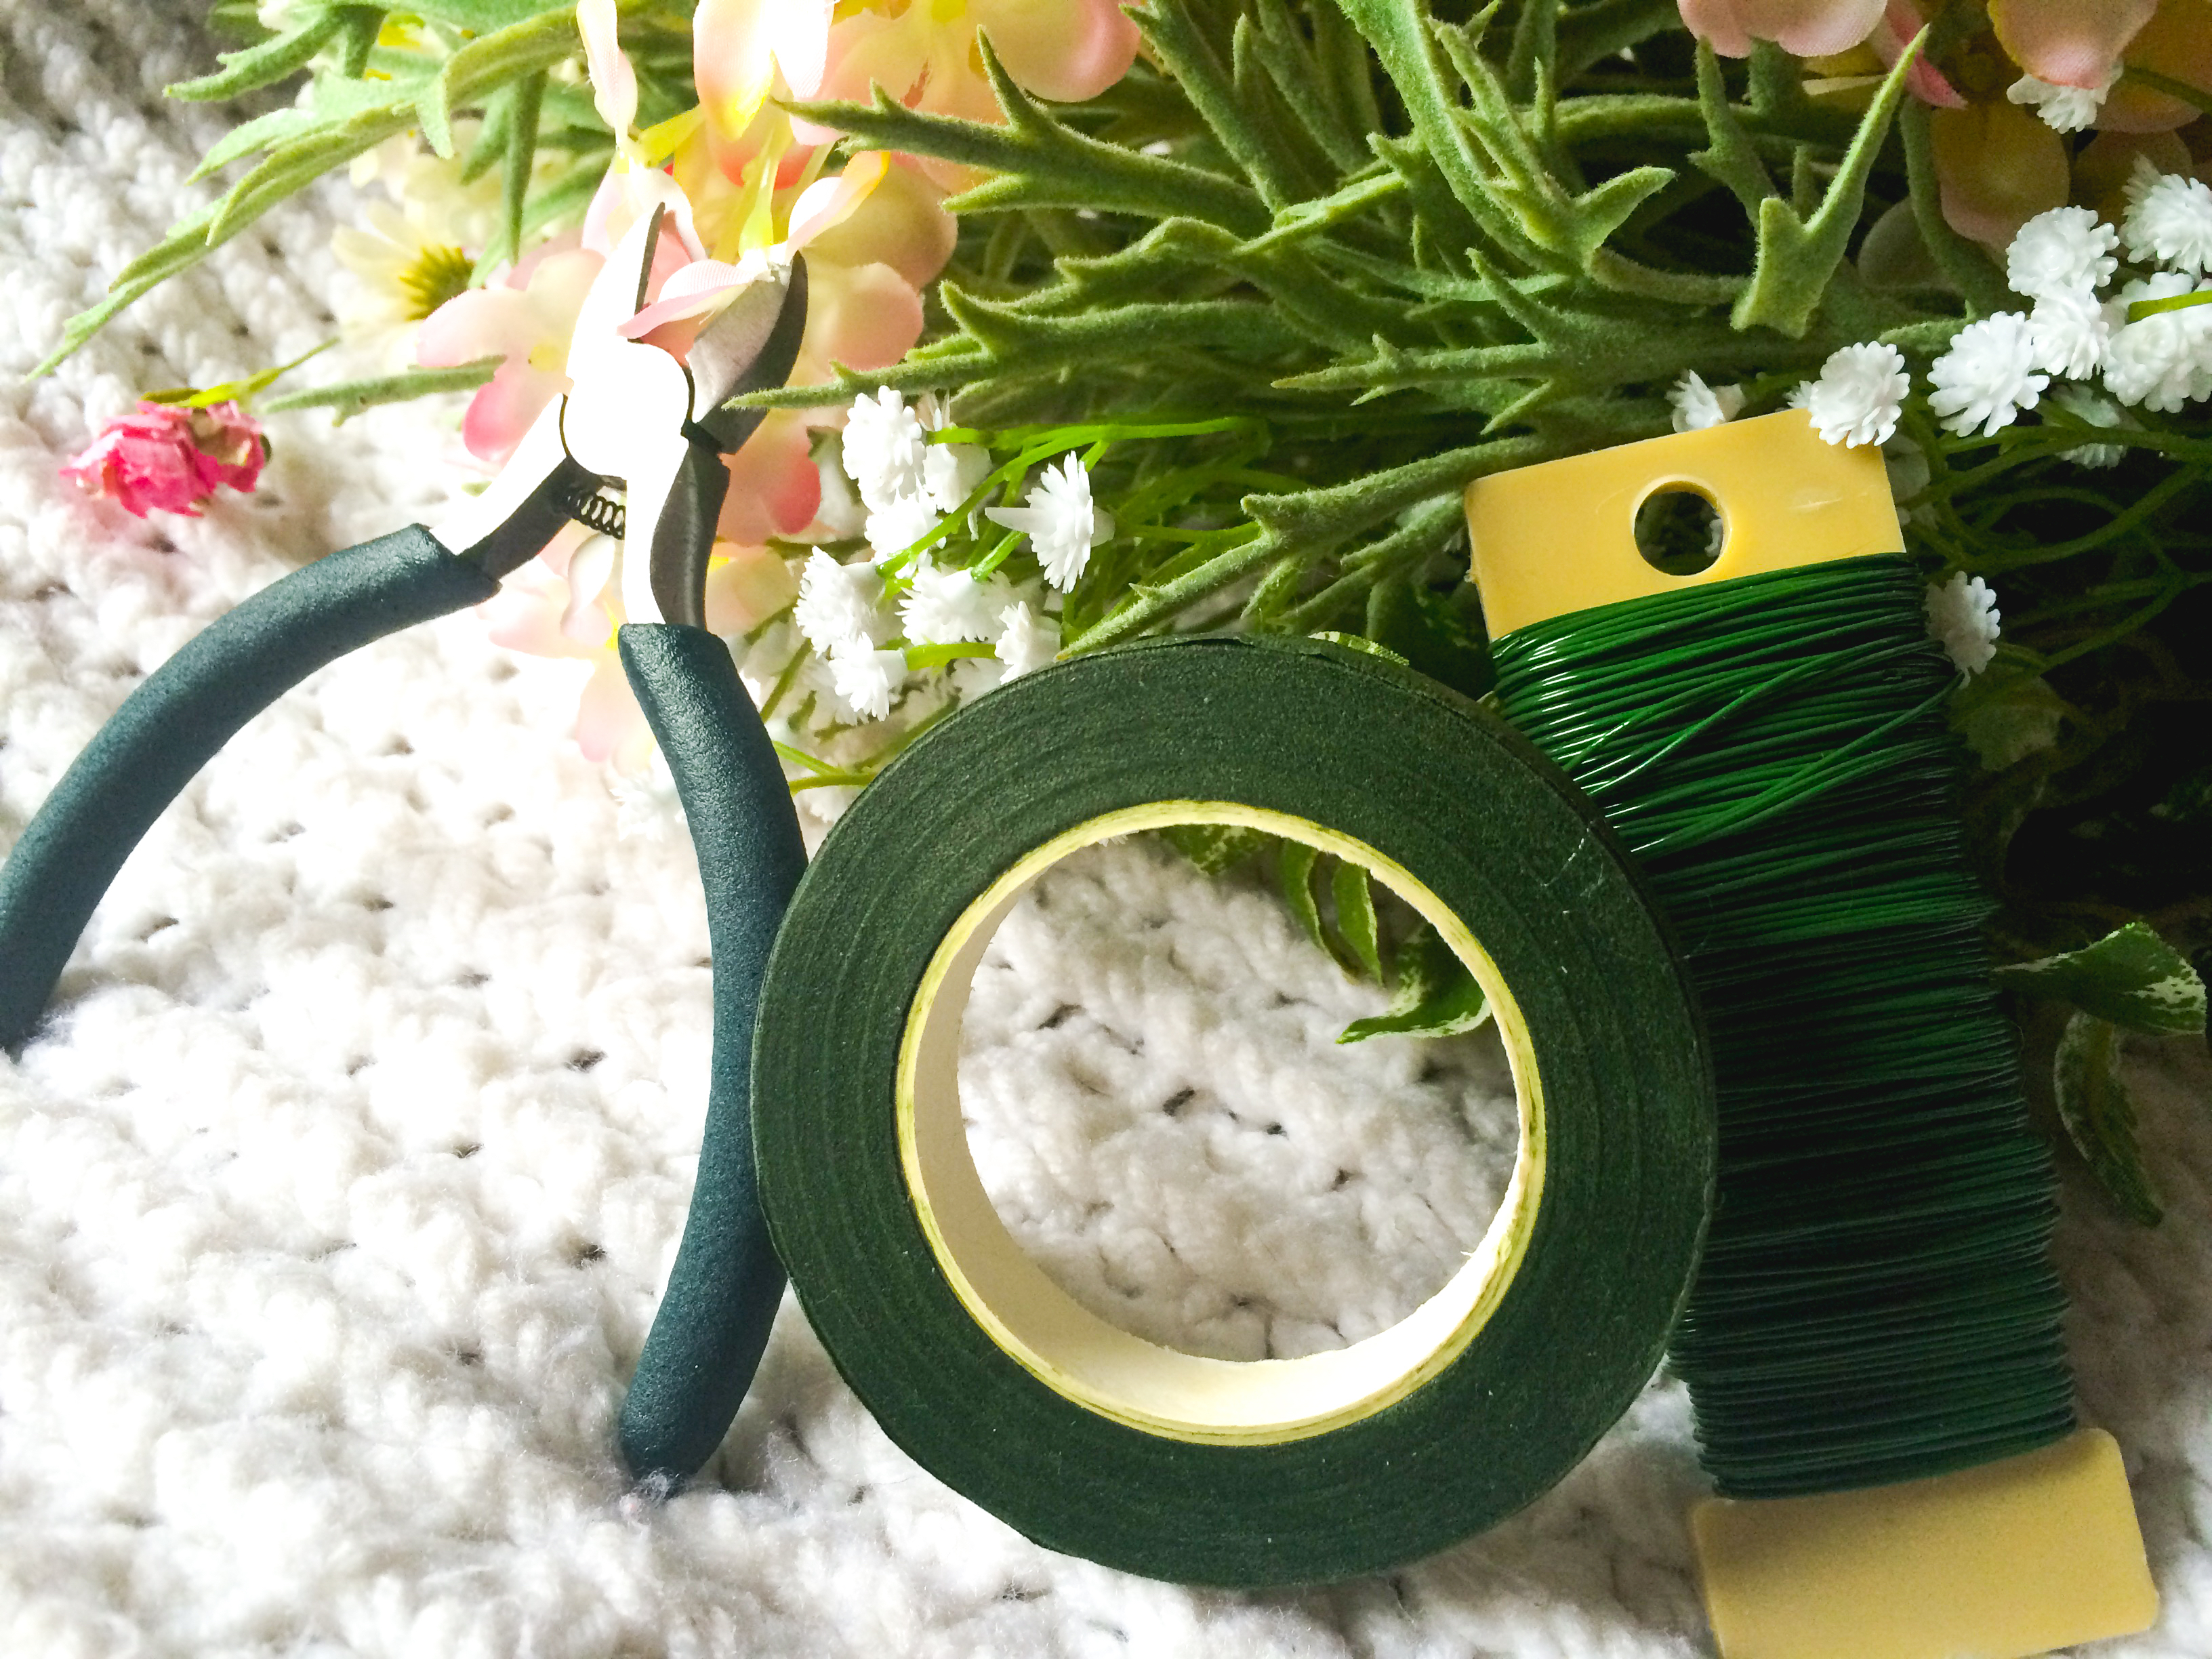
After you’ve gotten your flowers and greenery, you’re going to want floral tape, wire clippers (or sharp scissors), and floral wire. Step one is taking the wire, roughly measuring your head around where you want your crown to sit and doubling up on the wire to make it more substantial. Make sure to measure a little bit bigger than your head actually is, because with the tape and flowers, the crown’s going to shrink some.
Once you’ve got your wire measured out and doubled up, tape the ends together with the floral tape. Tear off pieces of floral tape—about five inches long—and start wrapping them at a slight angle to overlap with the tape you’ve already wrapped on the wire. Continue that process until you’ve gotten the whole wire base covered. Next, you’re going to want to cut down your greenery to a size that suits your purposes. Take your floral tape and—you guessed it—tape the greenery down. Repeat until the entire crown is covered to some extent and then you can either prune the greenery or begin to attach the flowers onto your crown.
When you’re ready to, you’re going to need to find a technique that works for you with regards to the flowers. Personally, cutting my stems short and taping them worked for me. Try to think ahead a bit. I didn’t have the foresight at the beginning to NOT use some flowers I wanted visible, and I overlooked the fact that the more flowers you add, the harder the crown gets to navigate. I recommend taking a few minutes and planning things out some. Think for a little about how it’ll all look when the flowers are layered and then you can get going.
Finally, arrange and tape as you please. After a while, you’ll see some patches that don’t look how you want them to. Maybe they’re too flat. Maybe there’s too much visible greenery. The fuller flowers you have can fill some gaps and add volume where you want it. While it’s good to have an idea of what you want, you don’t need to be excessively rigid about spacing. As long as it looks good to you, it’s a good crown.
Ultimately, you’ll know when you’re done. There’s no timer and it’s all about whether you’re into what you’ve created. The good news is that you can get a lot of flowers really cheap at the Dollar Tree and JoAnn’s, and that you probably have enough wire to last you a thousand Coachellas. So, get crafting and make as many flower crowns as you could possibly want, and feel majestic. You deserve it. It’s been a long semester.
Subscribe to the Mossy Log Newsletter
Stay up to date with the goings-on at Lewis & Clark! Get the top stories or your favorite section delivered to your inbox whenever we release a new issue.
Leave a Reply