May 18, 1980 will go down in history as the day that saw Mount St. Helens erupt. The sheer intensity of its destruction inspired many artists to record and capture its beauty and power in various forms. To commemorate the 40th anniversary of the eruption, the Portland Art Museum is presenting their newest exhibition “Volcano!” until May 17, 2020. The exhibition shows pieces from 1845 to the present, displaying the savagery and tranquility of St. Helens.
The front of the exhibition features a wall with the exhibition’s title and an acknowledgement to indigenous communities of the past, present and future. This introduction is immediately followed by an informational panel on Lawetlat’la, the name given to the mountain by the Cowlitz tribe and the Confederated tribes and bands of the Yakama Nation.
Placed after the acknowledgement stands a massive photograph of St. Helens that spans two stories. The wall to the immediate left displays three acrylic paintings by Ryan Molenkamp inspired by a series of time lapse photos of the eruption from the photographer Vern Hodgson. The piece is entitled “Vancouver, Vancouver, This is it,” which was the last transmission from geologist David A. Johnston before being killed by the blast.
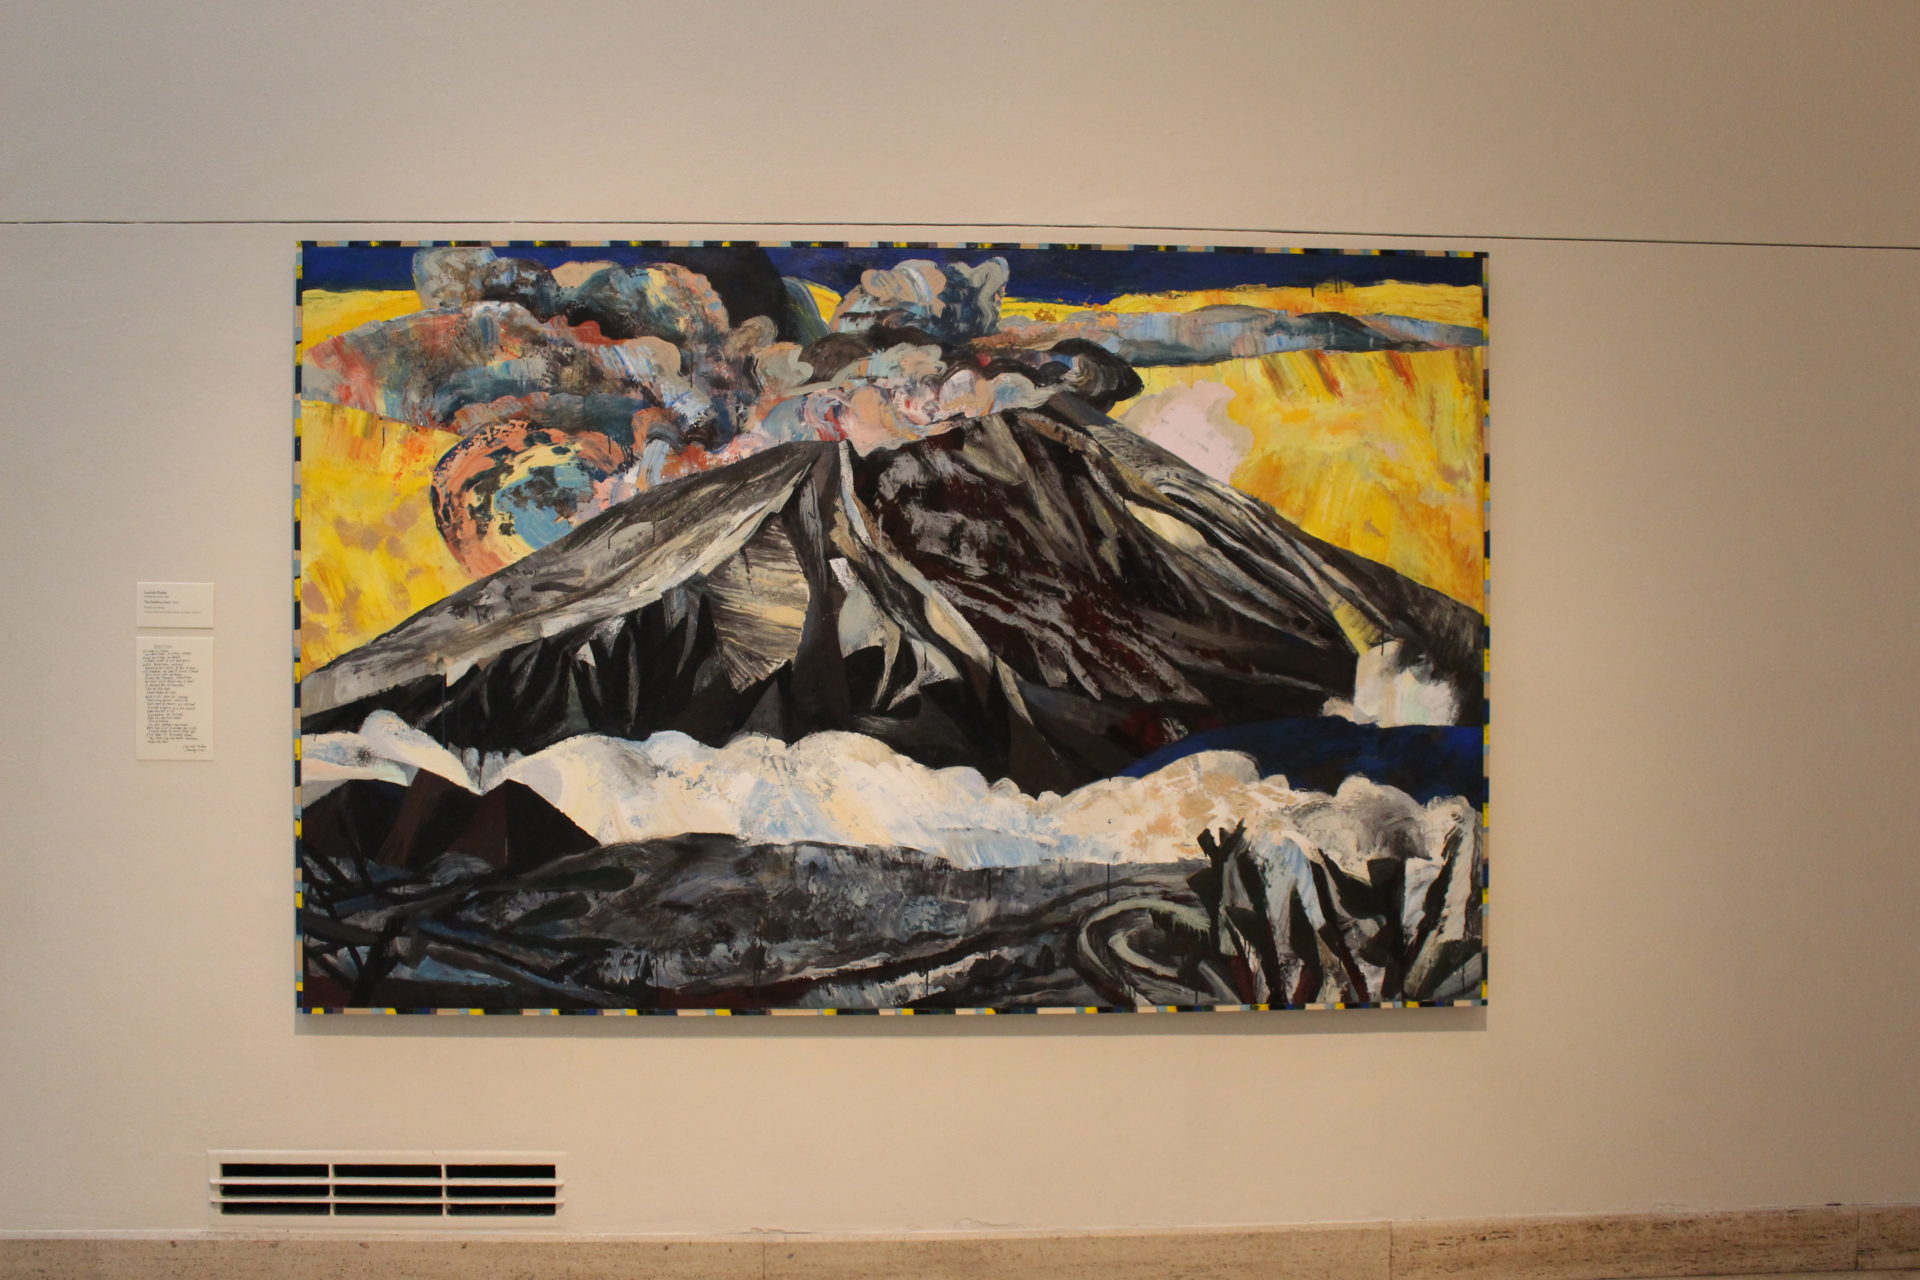
Across from this wall is Lucinda Parker’s large painting entitled “The Seething Saint,” paired alongside her poem “Eruption.” The poem bookends a pleasant trip to the mountain with its cataclysmic eruption. The painting mirrors this sentiment by surrounding the mountain in an angelic yellow. Even before entering the first room of the exhibition, attendees are already overtaken by these large, beautiful pieces in cheerfully bright colors depicting the St. Helens eruption. The pieces portray the eruption as a child having a colorful tantrum.
The first room of the exhibition is filled with oil-painted landscapes depicting the previously conical shape of this great Pacific Northwestern peak. This peaceful room is strikingly followed by paintings of the eruption itself, from eyewitness accounts in Seattle and Portland. These pieces inspire emotions of fear, chaos and fragility through the use of vivid colors, creating eye catching images that demand the attention of attendees. The walls are painted a dark gray, which makes the pieces stand out and simultaneously creates a very somber tone to this part of the exhibition.
This room is followed by a series of lighter rooms filled with photography and other pieces displaying the aftermath of the eruption and the land it decimated. However, even though the white walls and bright lights that surround this part of the exhibition make it visually brighter, the pieces depict the leveling effects of the eruption. Cameron Martin’s 11-foot-wide painting “Remission” stands at the end of the exhibition in the last of the series of light rooms. This large work shows the instability of the volcano and leaves attendees to ponder if and when another eruption will happen.
Outside the exhibition there is a community partner in residency gallery organized in collaboration with the Mount St. Helens Institute. The community space is filled with lounge chairs, sofas, books, maps, scientific equipment and geological materials for attendees to further their exploration of Mount St. Helens. While “Volcano!” is a huge exhibition, it wastes no time whatsoever drawing attendees into its packed and filled walls. It still provides ample space and opportunity to collectively unpack and further discover Mount St. Helens in a low-stress environment.
“Volcano!” does a great job at showing the horrific yet captivating power of a natural disaster that claimed 57 lives. It manages to keep the horror alive and intense despite how much time has elapsed from the time of the event to now. The impact of Mount St. Helens did not merely influence the operations of humans. The land after the eruption looked apocalyptic and greatly affected the environment; however there is a certain beauty in entropy and “Volcano!” successfully captured it.
Subscribe to the Mossy Log Newsletter
Stay up to date with the goings-on at Lewis & Clark! Get the top stories or your favorite section delivered to your inbox whenever we release a new issue.
Leave a Reply